

A comprehensive, step-by-step, visual guide to help you get started on mining Argentum and Unitus! Before we start - note that this guide will explain how to merge-mine both coins, where you will receive the additional UIS at no extra cost!
How to mine ARG and UIS on Easy Mine
Generate BAT file
With the form below you can generate the BAT file for your miner, which you'll need to start it. If you add this file to the folder that contains the CPUminer then you're ready to start mining. The top field takes your Miner's address, the second field (optionally) a worker name and the dropdown menu selects which executable to use. Below we provide a table that can be used as a rule of thumb however, we advise that you try out the different variants for your CPU yourself as individual results may vary.
| Executable Name | Architecture Name |
|---|---|
| cpuminer-sse2.exe | 2, Nehalem |
| cpuminer-aes-sse42.exe | Westmere, Sandy/Ivy Bridge |
| cpuminer-avx.exe | Sandy/Ivy Bridge |
| cpuminer-avx2.exe | Haswell, Sky/Kaby/Coffee Lake |
| cpuminer-avx2-sha.exe | Ryzen |
Pressing "Download BAT" will initiate a download of the file itself, additionally it will put the content of this BAT in the text field below. Incase you want to create your own BAT file.
Table of Contents
Before you can start your mining adventure, you’ll need to download some wallets. These will allow you to access your currencies when you’ve mined them. We’ll need two wallets: One for Argentum and one for Unitus.
Step 1A - Argentum wallet
This guide will focus on the official Argentum wallet. The process for other wallets should be similar.
If you really want to, it is possible to directly mine to an exchange deposit address. However, do realize that this does NOT allow you to sign messages (we’ll need this to claim our Unitus and modify payout thresholds). Another important point is that some exchanges change the deposit address, which will mean that you won’t receive your Argentum payout! Therefore, mining directly to an exchange is NOT RECOMMENDED.
The Argentum wallet can be found here. After downloading the wallet for your operating system, you can start the installation process.
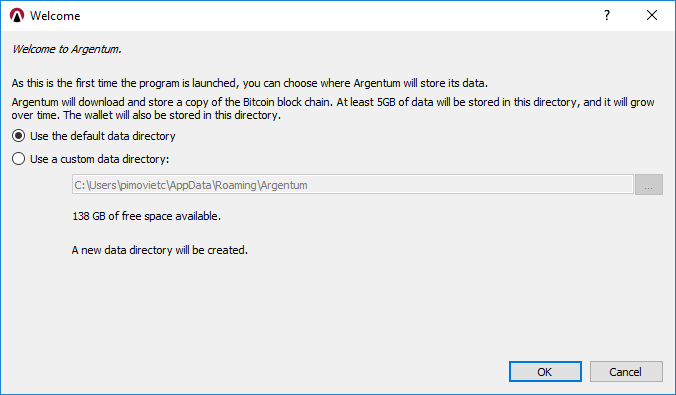
The first time you launch the Argentum wallet, you may choose where the data is stored. By default, this is at %appdata%\Argentumcoin
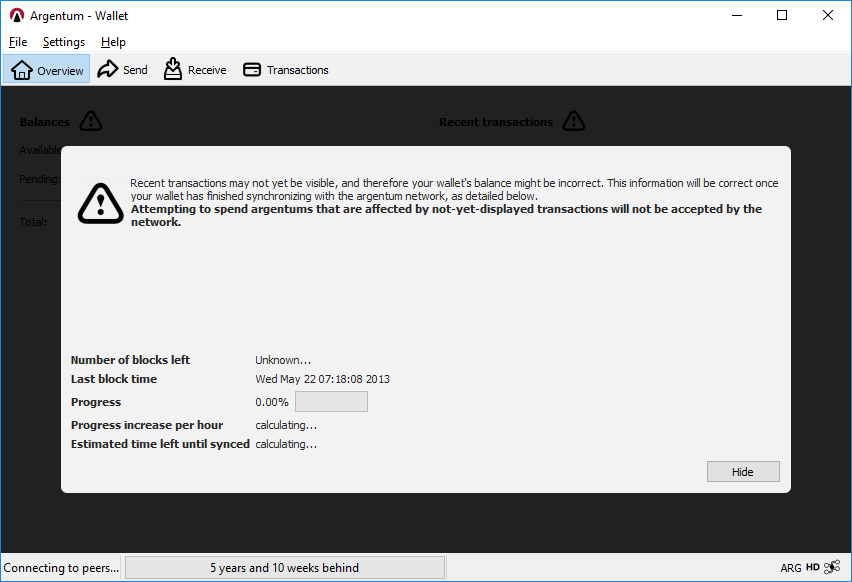
Next up - The wallet will start to synchronize with the network. This will take a long time to finish. Therefore, I’d recommend leaving it synchronizing overnight. However, it is possible to continue while it is synchronizing.
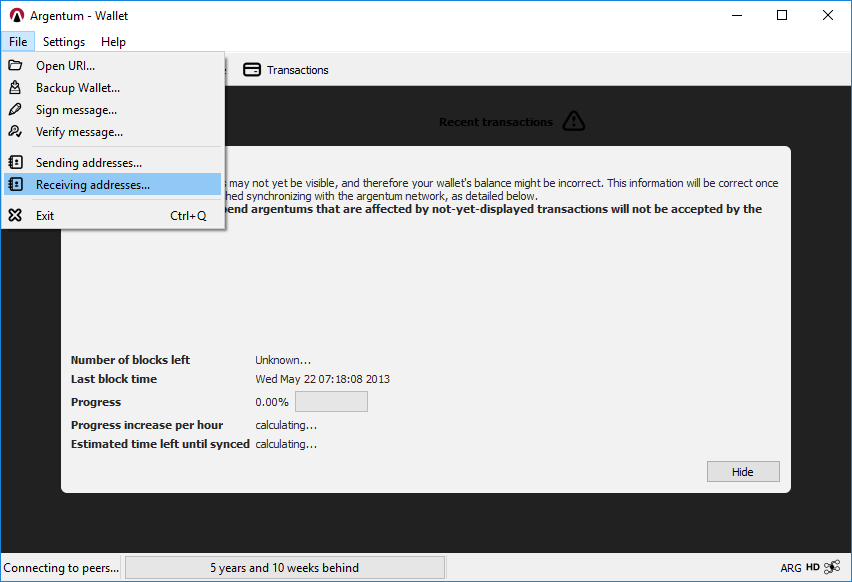
If you go to File>Receiving addresses… you’ll be able to generate a new Argentum address.
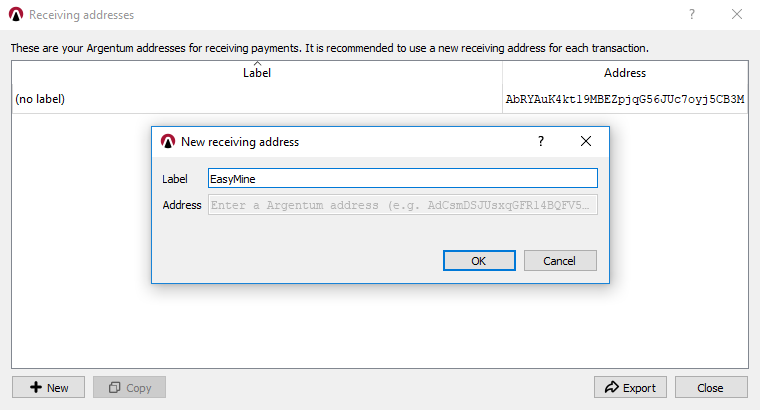
Give it a fancy name like “EasyMine” and press ok. The wallet will then generate an address.
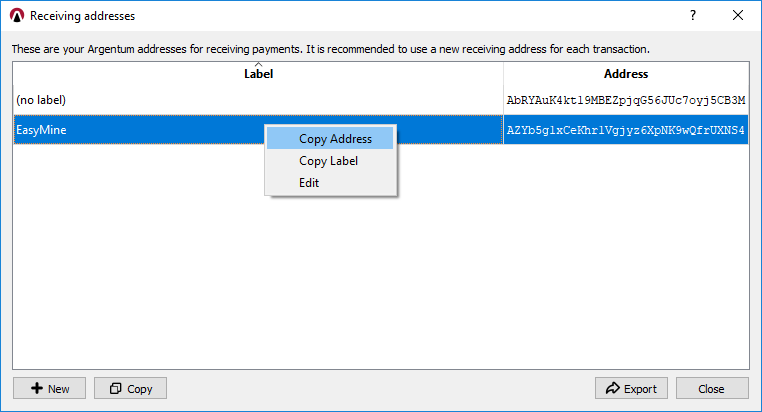
Lastly, you may copy the address and save it for use later. This is the address we’ll be needing to mine on EasyMine. The address should start with a capital A and is a randomized string of 34 characters, e.g. AZYb5g1xCeKhr1Vgjyz6XpNK9wQfrUXNS4
That wraps it up for the Argentum wallet, on to the next step!
Step 1B - Unitus wallet
The Unitus Wallet can be found here. After downloading the wallet for your operating system, you can start the installation process.
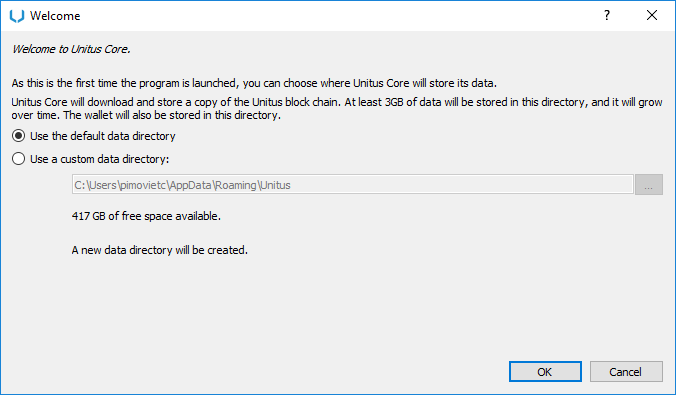
The first time you launch the Unitus wallet, you may choose where the data is stored. By default, this is at %appdata%\Unitus
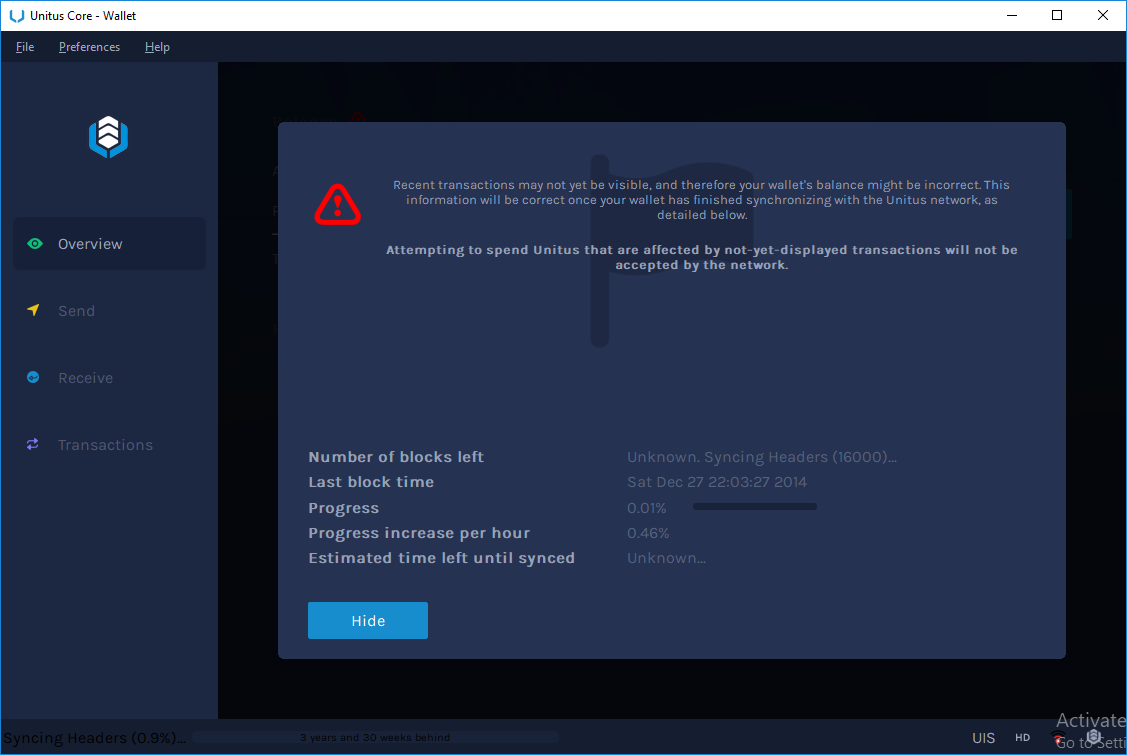
Next up - The wallet will start to synchronize with the network. This will take a long time to finish. Therefore, I’d recommend leaving it synchronizing overnight. However, it is possible to continue while it is synchronizing.
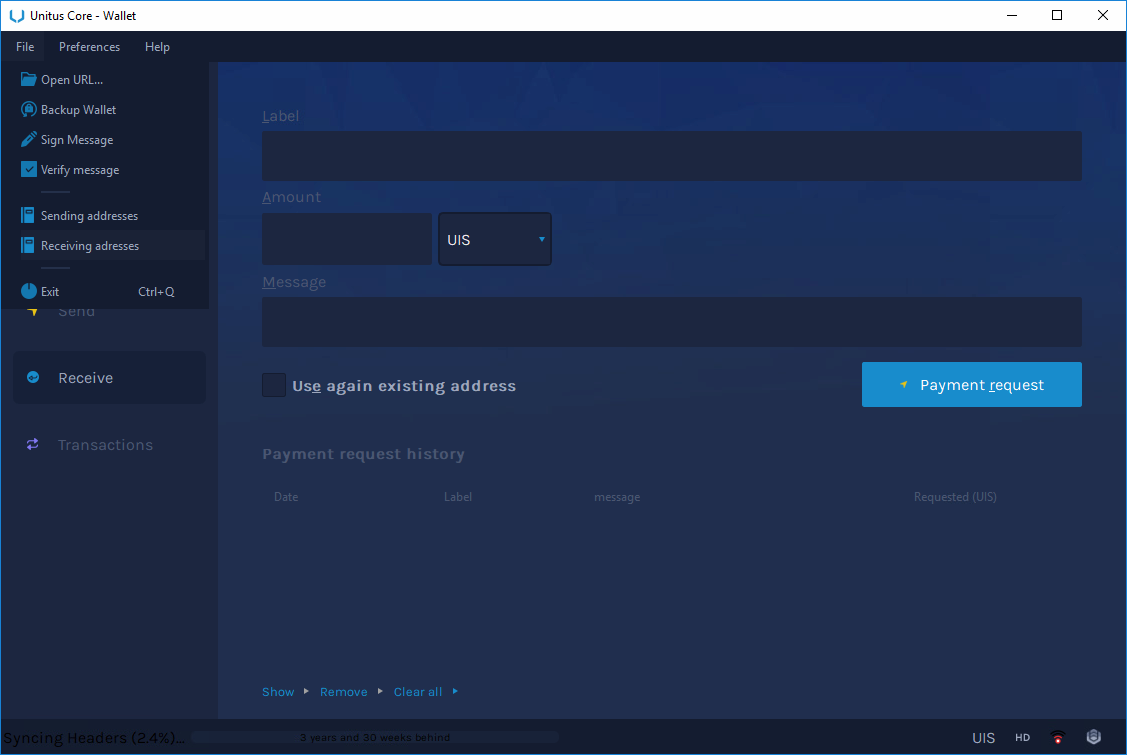
If you go to File>Receiving addresses… you’ll be able to generate a new UIS address.
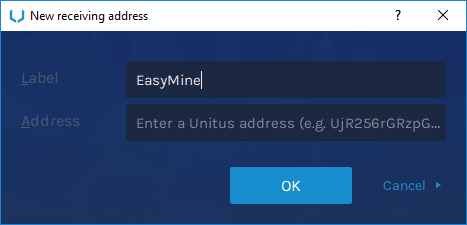
Give it a fancy name like “EasyMine” and press ok. The wallet will then generate an address.
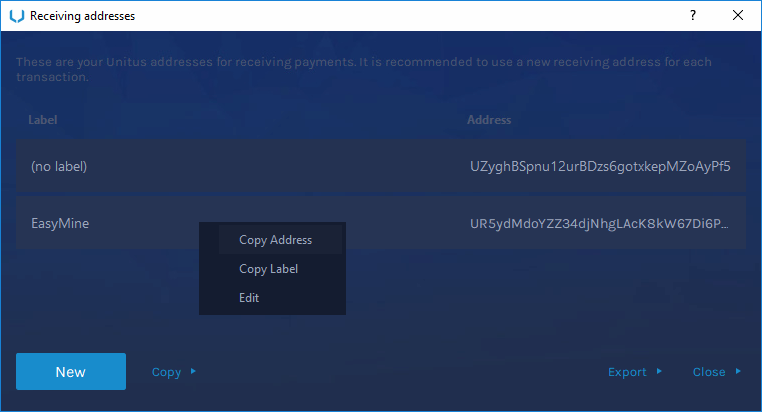
Lastly, you may copy the address and save it for use later. We’ll be needing this address when we’re linking it to our miner! The address will be a string of 34 characters starting with a capital U, e.g. Ui67Stxp5ZumXtJYgB8P465vn6Gm4asunu
That wraps up the wallet set ups, and now we can start working on our miner!
Back to topTo mine Argentum, we’ll need a mining tool that uses the Argon2D algorithm. We will use the latest cpuminer-opt release. You can find the latest release on the JayDDee/cpuminer-opt github or you can directly find it here: https://github.com/JayDDee/cpuminer-opt/releases/.
Note make sure you download the cpuminer-opt-X.X.X.X-windows.zip file, that archive contains precompiled versions of the miner.
Step 2.1 - Setting up the actual miner, bat files and such
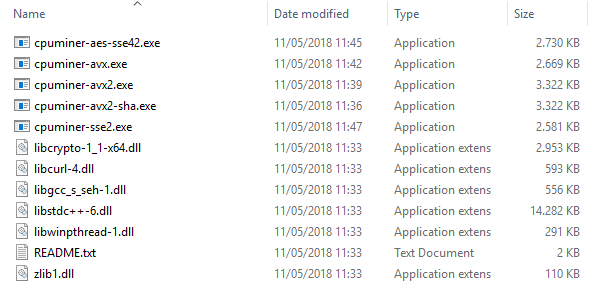
After extraction, your Miner’s folder should look like this. Depending on your CPU you should use a different executable. Below we provide a table that can be used as a rule of thumb however, we advise that you try out the different variants for your CPU yourself as individual results may vary.
| Executable Name | Architecture Name |
|---|---|
| cpuminer-sse2.exe | 2, Nehalem |
| cpuminer-aes-sse42.exe | Westmere, Sandy/Ivy Bridge |
| cpuminer-avx.exe | Sandy/Ivy Bridge |
| cpuminer-avx2.exe | Haswell, Sky/Kaby/Coffee Lake |
| cpuminer-avx2-sha.exe | Ryzen |
Open your favorite text editor (we’ll use Notepad), and paste the following without quotation marks:
“EXECUTABLE -a argon2d4096 -o stratum+tcp://argon-argentum.easymine.online:9000 -u YOUR_ARG_ADDRESS.WORKER_NAME -p x”
for example
“cpuminer-sse2.exe -a argon2d4096 -o stratum+tcp://argon-argentum.easymine.online:9000 -u AZYb5g1xCeKhr1Vgjyz6XpNK9wQfrUXNS4 -p x”
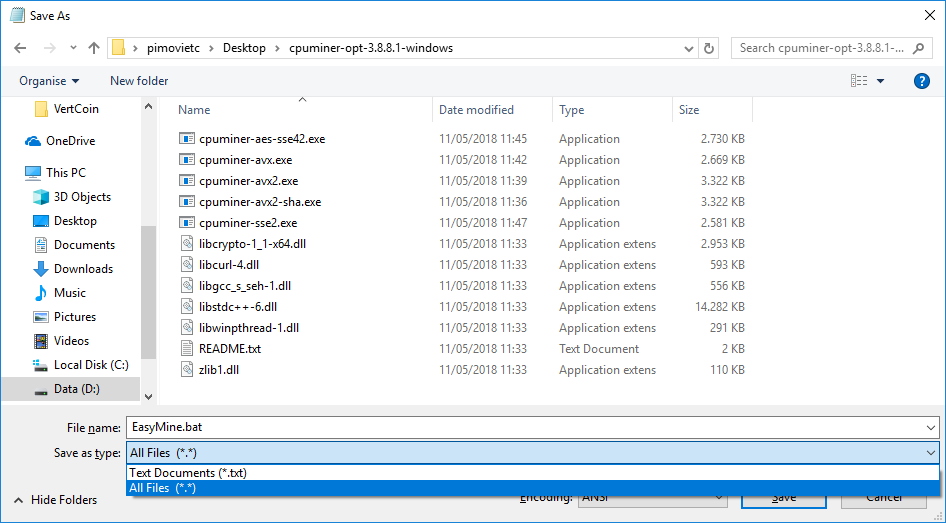
Then press Save As, give it a fancy name like EasyMine.bat (the extension is important!), and don’t forget to switch the Save as Type to All Files.
If you want to, you can omit the worker name and only use your ARG address (note - do not use the . if you’re not using a worker name!)
Alternatively you can generate your BAT file over here.
Step 2.2 - Running your miner - Congrats!
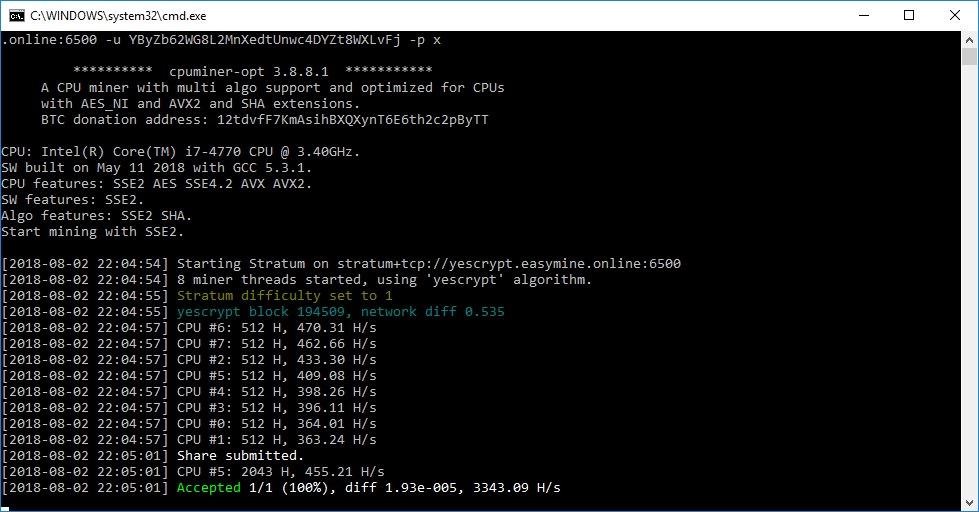
You can now launch your miner by double clicking on EasyMine.bat (the extension might be hidden!). If everything is working correctly, you should start seeing shares being accepted.
Lastly, you’d want to verify if everything is working by going to https://argentum.easymine.online/miner/YOUR_ADDRESS
for example: https://argentum.easymine.online/miner/AZYb5g1xCeKhr1Vgjyz6XpNK9wQfrUXNS4
After a while, you should be able to see some shares trickling in. These will eventually result in a payment to your Wallet!
If you see shares on your miner’s page, then you’re officially mining Argentum, congratulations! You can now go to Step 3 to link your Unitus wallet to your Miner. If you don’t, you’ll still be mining both ARG and UIS. The UIS will be stored in your pending rewards until you either add a wallet or become inactive for too long.
Back to topNext up - we want to add our UIS wallet to our EasyMine page to enable payouts for UIS! We’ll be needing the Unitus address, the Argentum Wallet and our EasyMine miner’s page. This guide explains the process from the Argentum Wallet. The process is similar for the other wallets. However, some things might look different.
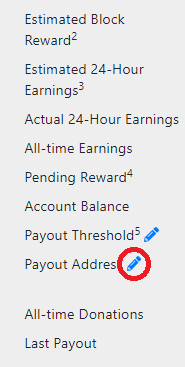
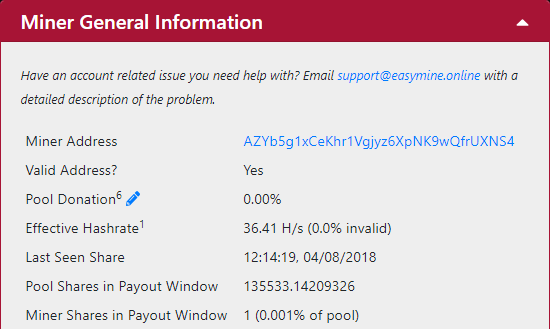
Under “Miner General Information”, locate the blue pencil next to “Payout Address”. This will take you directly to https://argentum.easymine.online/settings/YOUR_ADDRESS, which is where you can change your account settings, including your UIS payout address.
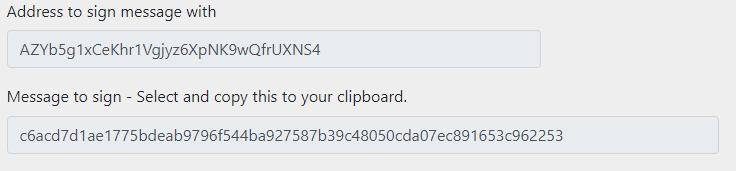
Each time you visit this page, it will show you a (newly generated) message that you need to sign with your wallet. Note that it also tells you that you MUST sign it from your miner’s address. This is important because most wallets will automatically generate new addresses (which are all linked together), and you have to pay attention that you’re using the correct one!
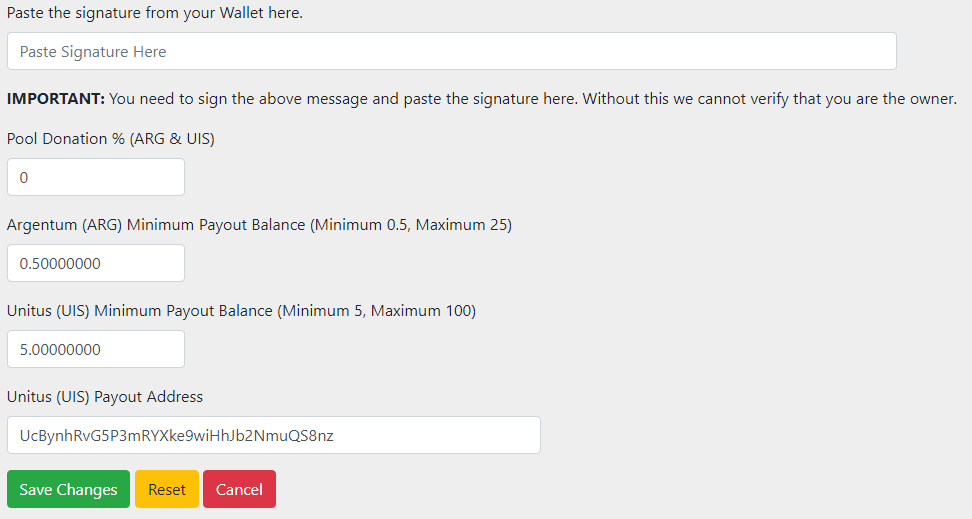
At the bottom of the page, you’ll find all the settings you can change. In the very last field, you want to paste your UIS address. Before pressing “Save Changes”, we’ll first have to sign the actual message that we mentioned earlier.
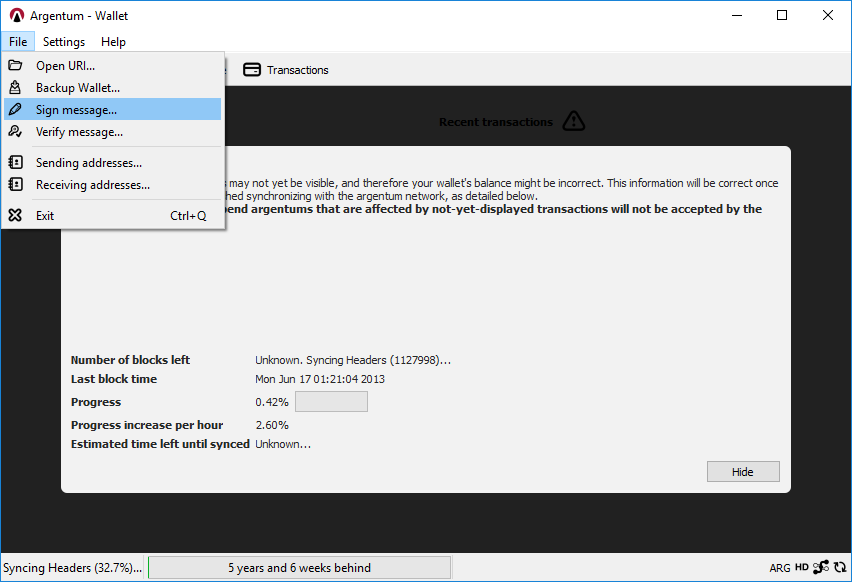
This is where we need to switch back to the Argentum Wallet and navigate to “Sign message”
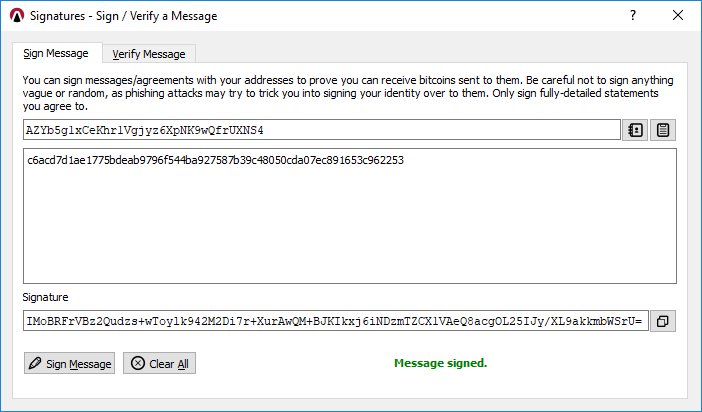
Choose or paste the correct address in the first field, and paste the message in the second. After pressing “Sign Message”, a signature will be generated at the bottom. You’ll need to copy this string and paste it in the correct field on the “Change Account Settings” page and hit “Save Changes”.
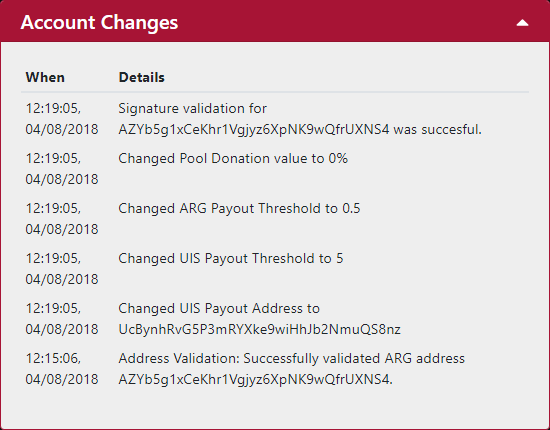
After a while, you should be able to see the changes take effect on your Miner’s Page. It will take some time before your UIS address is validated. However, once it is you’ll start receiving UIS payouts!
Congratulations! You’ve successfully set up your miner, ARG and UIS wallets!
Back to top