

A comprehensive, step-by-step, visual guide to help you get started on mining Unitus!
How to mine UIS on Easy Mine
Generate BAT file
With the form below you can generate the BAT file for your miner, which you'll need to start it. If you add this file to the folder that contains the CPUminer then you're ready to start mining. The top field takes your Miner's address, the second field (optionally) a worker name and the dropdown menu selects which executable to use. Below we provide a table that can be used as a rule of thumb however, we advise that you try out the different variants for your CPU yourself as individual results may vary.
| Executable Name | Architecture Name |
|---|---|
| cpuminer-sse2.exe | Core 2, Nehalem |
| cpuminer-aes-sse42.exe | Westmere, Sandy/Ivy Bridge |
| cpuminer-avx.exe | Sandy/Ivy Bridge |
| cpuminer-avx2.exe | Haswell, Sky/Kaby/Coffee Lake |
| cpuminer-avx2-sha.exe | Ryzen |
Pressing "Download BAT" will initiate a download of the file itself, additionally it will put the content of this BAT in the text field below. Incase you want to create your own BAT file.
Table of Contents
Before you can start your mining adventure, you’ll need to download the unitus wallet. This will allow you to access your currency when you’ve mined it.
The Unitus Wallet can be found here. After downloading the wallet for your operating system, you can start the installation process.
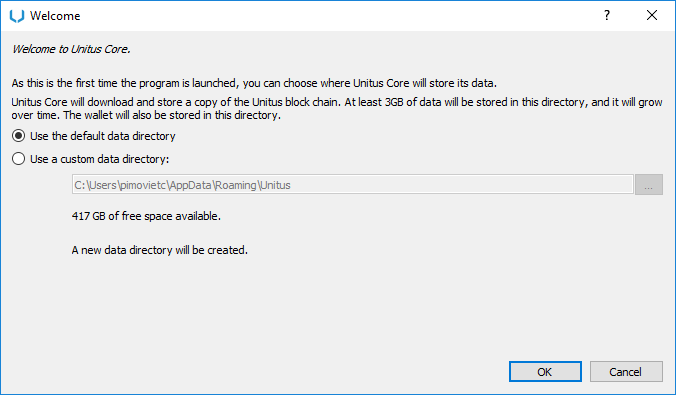
The first time you launch the Unitus wallet, you may choose where the data is stored. By default, this is at %appdata%\Unitus
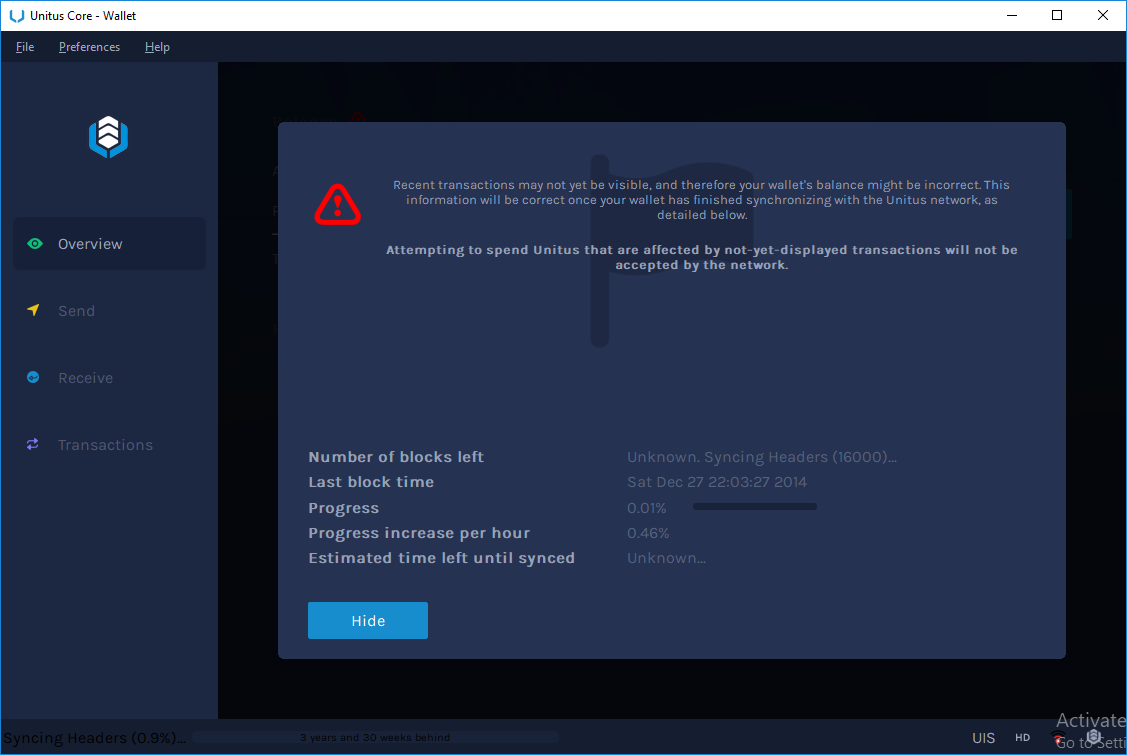
Next up - The wallet will start to synchronize with the network. This will take a long time to finish. Therefore, I’d recommend leaving it synchronizing overnight. However, it is possible to continue while it is synchronizing.
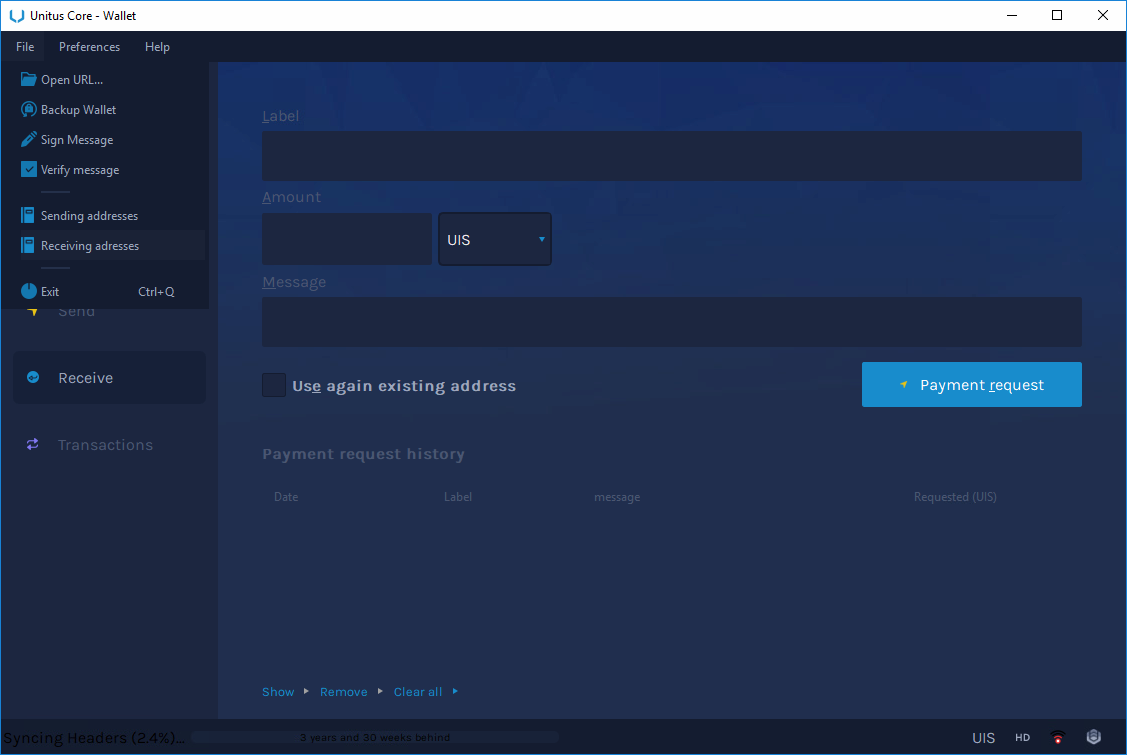
If you go to File>Receiving addresses… you’ll be able to generate a new UIS address.
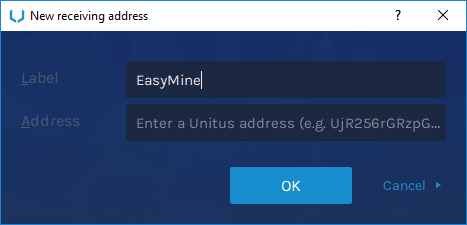
Give it a fancy name like “EasyMine” and press ok. The wallet will then generate an address.
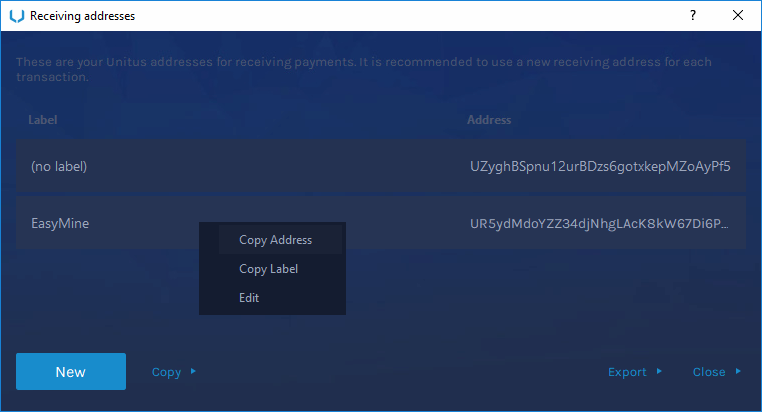
Lastly, you may copy the address and save it for use later. We’ll be needing this address when we’re linking it to our miner! The address will be a string of 34 characters starting with a capital U, e.g. Ui67Stxp5ZumXtJYgB8P465vn6Gm4asunu
That wraps up the wallet set up, and now we can start working on our miner!
Back to topTo mine Unitus, we’ll need a mining tool that uses the Argon2D algorithm. We will use the latest cpuminer-opt release. You can find the latest release on the JayDDee/cpuminer-opt github or you can directly find it here: https://github.com/JayDDee/cpuminer-opt/releases/.
Note make sure you download the cpuminer-opt-X.X.X.X-windows.zip file, that archive contains precompiled versions of the miner.
Step 2.1 - Setting up the actual miner, bat files and such
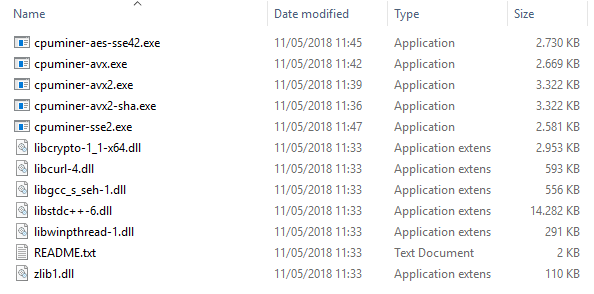
After extraction, your Miner’s folder should look like this. Depending on your CPU you should use a different executable. Below we provide a table that can be used as a rule of thumb however, we advise that you try out the different variants for your CPU yourself as individual results may vary.
| Executable Name | Architecture Name |
|---|---|
| cpuminer-sse2.exe | Core 2, Nehalem |
| cpuminer-aes-sse42.exe | Westmere, Sandy/Ivy Bridge |
| cpuminer-avx.exe | Sandy/Ivy Bridge |
| cpuminer-avx2.exe | Haswell, Sky/Kaby/Coffee Lake |
| cpuminer-avx2-sha.exe | Ryzen |
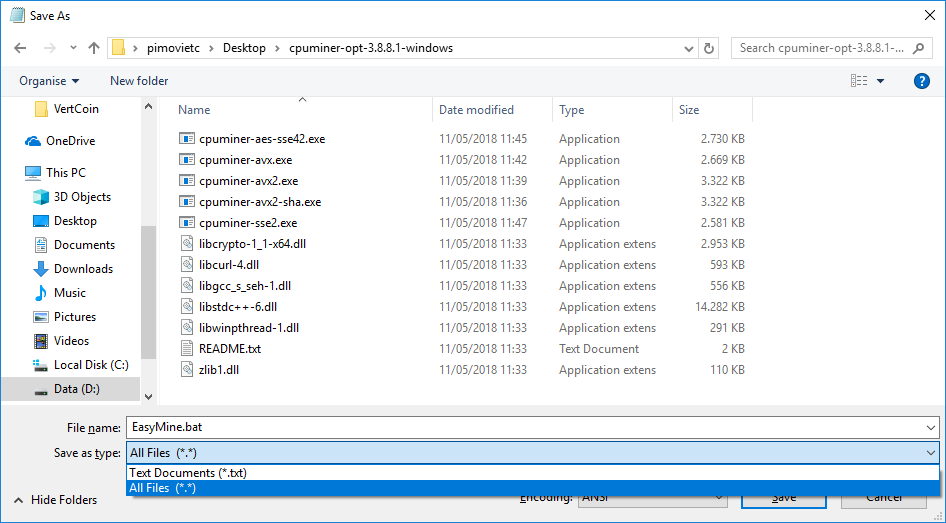
Open your favorite text editor (we’ll use Notepad), and paste the following without quotation marks:
“EXECUTABLE -a argon2d4096 -o stratum+tcp://argon.easymine.online:3003 -u YOUR_UIS_ADDRESS.WORKER_NAME -p x”
for example
“cpuminer-sse2.exe -a argon2d4096 -o stratum+tcp://argon.easymine.online:3003 -u UcBynhRvG5P3mRYXke9wiHhJb2NmuQS8nz -p x”
Then press Save As, give it a fancy name like EasyMine.bat (the extension is important!), and don’t forget to switch the Save as Type to All Files.
If you want to, you can omit the worker name and only use your UIS address (note - do not use the . if you’re not using a worker name!)
Alternatively you can generate your BAT file over here.
Step 2.2 - Running your miner - Congrats!
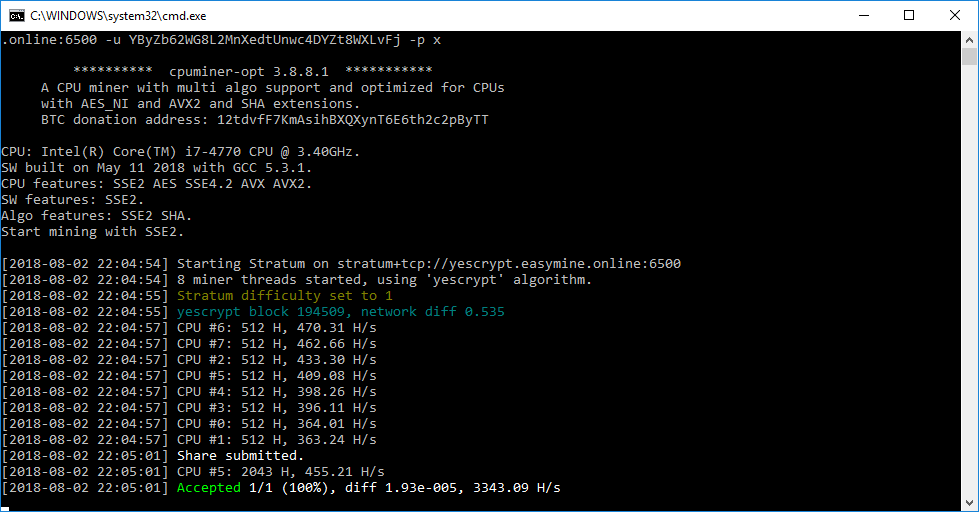
You can now launch your miner by double clicking on EasyMine.bat (the extension might be hidden!). If everything is working correctly, you should start seeing shares being accepted.
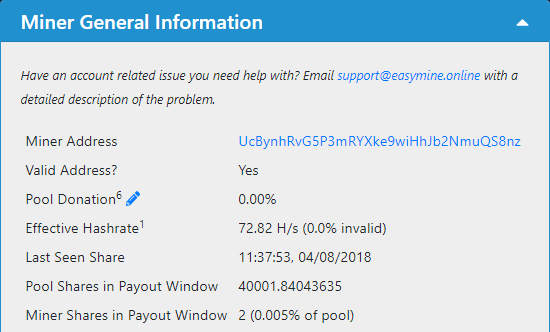
Lastly, you’d want to verify if everything is working by going to https://unitus.easymine.online/miner/YOUR_ADDRESS
for example: https://unitus.easymine.online/miner/UcBynhRvG5P3mRYXke9wiHhJb2NmuQS8nz
After a while, you should be able to see some shares trickling in. These will eventually result in a payment to your Wallet!
If you see shares on your miner’s page, then you’re officially mining Unitus, congratulations!
Back to top